Tuesday, 30 June 2015

Decrypting the Password from the ITIM property files in JAVA

Decrypting the Password from the ITIM property files in JAVA.

Yes we can decrypt an encrypted password from the ISIM Property files like enRoleLDAPConnection.properties and enRoledatabase.properties file.
This can be very helpful when you are trying to connect to ISIM LDAP or DB in the java code from workflows using FESI Extension or custom Extension or even in ISIM Hooked Reports.

The by default com.ibm.itim.common.properties package Provided by IBM in the websphere Libraries contains a class called PropertiesManager

Create an object for this class and check for the options of methods it provides from it.
Use the method called getEncryptedProperty and get the decrypted password.

Confused....... and probably wondering why the heck do you need all the above information right.
Ok then to make it much easier see the below sample code for reference.


Sample Code for reference

//add the below line along with your import statements
import com.ibm.itim.common.properties.PropertiesManager;

public class my class{

public myldapconnection(){
//creates an object for the PropertiesManager class
PropertiesManager pm =PropertiesManager.gInstance();
String ldapserverpwd =pm.getEncryptedProperty("enrole.ldap.connection","java.naming.security.credentials");


Ok so in the above code enrole.ldap.connection is actually an property in the properties.properties file in the <ISIM Installed location>/data/ folder
In my code The Properties Manager is refering to the properties.properties file and searching for the property file to look into.

Monday, 8 June 2015

java.io.FileNotFoundException in the TDI while using JNDI Connector as a feed to ISIM

ITIM from TDI using the JNDI connector result in java.io.FileNotFoundException.

Even though the file is present and it is of the correct format and in the correct location, TDI throws a file not found exception.
and yes it might not be because your file is not being able to be detected by the TDI but there can be other factors that are causing it.

There are typically two reasons for this error:
1. The port number defined in the URL definition is incorrect.
2. The name parameter on the TDI connection form is incorrect. (This actually results in a different error seen during the evaluation of this issue.

If a Certificate is deployed or if a VIP is defined for an Identity Manager WAS cluster, the URL to access the Identity Manager may look like this:

https://<ITIM VIP Hostname>/itim/console/main

But, the actual port where the enrole application is listening is not the standard 9080 or 80.

The Provider URL on the jndi connector - connection tab needs to match the port defined for the enrole application.

To determine the correct url/port:

Review the WAS Server's systemOut.log where the ITIM application is running.
Search for the startup details. For example:

WSVR0221I: Application started: ITIM
TCPC0001I: TCP Channel TCP_2 is listening on host * (IPv4) port 9082.


Therefore, on the TDI jndi connection tab, the ITIM Url must contain the correct (IPv4) port. For example,

http://<ITIM VIP Hostname>:9082/enrole/dsml2_event_handler
which matches the port defined in the WAS/Enrole.ear for the TCP listening port.

and finally
Verify the $dn is correctly formed based on the Naming Context/Search Base. For example:

ret.value="uid="+work.getString("UID")+","+<ConnectorName>.getConnectorParam("jndiSearchBase");

Thursday, 7 May 2015

Design Forms and Workflows in ISIM being blocked by the JAVA security Settings

Everyone has this issue when they are opening the workflows or design forms for the first time in any machine and you get this freaking error all the time.
The Easy solution for this is a simple configuration on your machine


There is things that you need to do, in order to fix this. 

1. Go to Control Panel and click on JAVA. But make sure you install the java first before doing this.
for ISIM I would recommend using 1.6 JDK or JRE for it 


2. Add the ITIM url to the trusted URL's in Java Configurations: <<<OR>>> (less secure)(3)


3. Lower the Security Level to Medium, so that all Java apps will be allowed after security danger promt (as always, change this setting at your own risk). 


4. Restart the browser, and try again 

Monday, 4 May 2015

ITIM WorkFlow: Steps to be followed in order to change a serial approval to work as parallel

Here are the steps to be followed in order to change a serial approval to work as parallel.


  1. ​​Login to IDSWebApp and connect to isim ldap. Must not use any other tool other than the IDSWebApp.
  2. Search for the workflow that needs change(this will be under operations ou in ldap).
  3. Go to attribute who stores the xml file export that binary.
  4. Open the xml in editor and search for the Loop name(workflow node). There will be SYNC attrbiute in the tag. Change this to ASYNC.
  5. Save the xml file.
  6. From IDS WebApp delete(assuming backup taken) the existing binary(xml file). Import the edited file.
  7. Save the changes and restart isim application.
  8. Test the work flow for the changes to reflect parallel approval.

Thursday, 19 March 2015

Configuring SSL between IBM security Identity manager and IBM TDS


There are 4 main concepts in doing this configuration.
Before doing this configuration first have the SSL configured on the IBM TDS LDAP instance…..if you refer my previous post of enabling ssl in IBM TDS LDAP instance you will be able to configure SSL on the TDS LDAP Instance.

First …..
Add the TDS certificate to Websphere CA Certs:
  1. Start the ikeyman utility. The utility (ikeyman.bat or ikeyman.sh) is in the WAS_HOME\bin.
  2. From the Key Database File menu, select Open.
  3. In the key database type, select JKS.
  4. In the File Name field, type cacerts.
  5. In the Location field, type WAS_HOME\java\jre\lib\security\.
  6. In the Password Prompt window, type the password for the keystore in the Password and Confirm Password window. The default password is changeit.
  7. Click OK.
  8. Add the certificate you created for the LDAP server into this certificate store.
    1. In the main window, in the Key database content area, select Signer Certificates from the list.
    2. Click Add.
    3. In the Certificate file name field, browse and locate the server certificate file that was created for the LDAP server, which is in Binary Der data. Verify that the appropriate directory is displayed in the Location field.
    4. Click OK.
    5. In the prompt, type a label for this certificate. For example, type LDAPCA.
    6. Click OK.

Secondly…..
Enabling ISIM to Communicate with LDAP using SSL Communication..
  1. Edit the enRoleLDAPConnection.properties file. This file is in the ISIM_HOME\data directory.
    1. Set the port value on the java.naming.provider.url property to the SSL port number configured on directory server [LDAP]. For example,
java.naming.provider.url=ldaps://localhost:636
    1. Set the value of the java.naming.security.protocol property to ssl. This setting directs the IBM Security Identity Manager Server to use SSL to communicate to LDAP.Alternately you can change the protocol in java.naming.provider.url from ldap to ldaps. For example,
java.naming.security.protocol=ssl
  1. Save the changes.
Thirdly……
Defining Custom JVM Properties in WebSphere
  1. Select Servers > Application Servers > server_name > Process Definition > Java Virtual Machine > Custom Properties > New.
  2. Define the name of the javax properties that you changed by using the ikeyman key management tool. You can create your own certificate store location, for which you must define some additional properties.
javax.net.ssl.trustStore – WebSphere jre_install_dir\lib\security\cacerts
eg: C:\Program Files\WebSphere\AppServer\java\jre\lib\security\cacerts
javax.net.ssl.trustStorePassword – changeit
javax.net.ssl.trustStoreType -- jks

Fourthly …..
Running LDAP Upgrade….
  1. Before running the ldapUpgrade utility, verify that enRoleLDAPConnections.properties, has java.naming.security.protocol set to ssl.
  2. Edit ISIM_HOME\bin\ldapUpgrade.lax file.
Add this property, which is one line:
lax.nl.java.option.additional=-Djavax.net.ssl.trustStoreType=jks -Djavax.net.ssl.trustStore=/opt/IBM/WebSphere/AppServer/java/jre/lib/security/cacerts -Djavax.net.ssl.trustStorePassword=changeit -Djava.ext.dirs=/opt/IBM/WebSphere/AppServer/java/jre/lib/ext:/opt/IBM/WebSphere/AppServer/plugins:/opt/IBM/WebSphere/AppServer/lib:/opt/IBM/WebSphere/AppServer/lib/ext
For example, on the Windows operating system:
lax.nl.java.option.additional=-Djavax.net.ssl.trustStoreType=jks -Djavax.net.ssl.trustStore=C:\Progra~1\IBM\WebSphere\AppServer\java\jre\lib\security\cacerts -Djavax.net.ssl.trustStorePassword=changeit -Djava.ext.dirs= C:\Progra~1\IBM\WebSphere\AppServer\java\jre\lib\ext; C:\Progra~1\IBM\WebSphere\AppServer\plugins;
C:\Progra~1\IBM\WebSphere\AppServer\lib;
C:\Progra~1\IBM\WebSphere\AppServer\lib\ext
Note: On the UNIX systems, the delimiter for the list of directories in java.ext.dirs must be a colon. On the Windows systems, the delimiter for these directories must be a semi-colon. Also, on Windows systems, use 8.3 notation for the directory names as there can be no spaces in the list.
  1. Test if this property is set correctly.
    1. Copy the property into the ISIM_HOME\bin\ldapConfig.lax file.
    2. Click Test on the ldapConfig screen. If the test returns a success message, the property is set correctly.
Note: Do not click Continue on the ldapConfig screen. Click Cancel to exit.

Now Restart the complete WebSphere including nodes, clusters and DMGR.
with this you configuration is complete….


Wednesday, 18 March 2015

SSL Configuration on IBM TDS LDAP server


Configuring SSL for IBM TDS Instance is it possible.....
Yes below are the steps to do it....

Steps to enable SSL communication using self-signed certificates.

  1. Login to LDAP server
  2. Take a backup of ibmslapd.conf  file.
  3. Run the below command to create a key database (CMS) to contain the server certificates as well as the server’s private and public keys.gsk8capicmd_64.exe -keydb -create -db E:\serverkey -pw password -type cms –stash
  4. On successful completion of the above command, four files will be created: serverkey.kdb, serverkey.rdb, serverkey.crl, serverkey.sth
  5. Create a self-signed certificate using the below command:gsk8capicmd_64.exe -cert -create -db E:\serverkey.kdb -pw password -label label_name -dn "cn=ldapcert,dc=com" -default_cert yes -expire 999
  6. Create an ldif file to configure TDS server to use this certificate.
   dn: cn=SSL,cn=Configuration
   changetype: modify
   replace: ibm-slapdSslAuth
   ibm-slapdSslAuth: serverAuth
   -
   replace: ibm-slapdSecurity
   ibm-slapdSecurity: SSL

   dn: cn=SSL,cn=Configuration
   changetype: modify
   replace: ibm-slapdSSLKeyDatabase
   ibm-slapdSSLKeyDatabase: E:\serverkey.kdb
   -
   replace:ibm-slapdSslCertificate
   ibm-slapdSslCertificate: label_name
   -
   replace: ibm-slapdSSLKeyDatabasePW
   ibm-slapdSSLKeyDatabasePW: password
7.       Run ldapmodify command to update TDS server with SSL configuration:
ldapmodify -D cn=root -w bind_pwd -p port -i “ldif_file”


8.       Restart LDAP instance and admin server.

Monday, 23 February 2015

Migrating the ISAMESSO IMS Server DB

Yes! you heard it right the database of the ISAMESSO IMS server can be Copied/Migrated/Moved to a different db server.

How to do it........

Follow the steps below.


1. Have your DB Administrator move the IMS DB to the new server. Make sure that the entire DB, all tables, data, views, users and schema are copied over.
2. Make sure usernames, passwords and database schema are exactly the same on the new database.
3. In your IMS Server Configuration Utility open up the Data source
4. Your IMS Data source will show your old IMS DB info, change your IMS DB URI to point to your new DB server and click update.
5. Perform the same steps for the Log data source and update.
6. Let’s move over to the WebSphere Integrated Solutions Console.
7. Under Applications > Application Types > Websphere enterprise applications stop your TAM E-SSO IMS Server
8. Update the DB server information Resources > JDBC > Data Sources > TAM E-SSO IMS Server Data Source, you will need to change the server name for the “Common and required data source properties. 
9. Select OK
10. Save your changes
11. Restart Websphere 
12. Start your IMS Server


Tuesday, 10 February 2015

Script to Delete a file using ITDI

What you have heard is correct you can delete a file from the system using TDI.

It is easy just a two lines of code is enough to delete a file using ITDI but you would need to make sure that you have the required permissions to delete the file or not.


Script to delete a file from the system 

var dirObj = new java.io.File("c:\\temp\\mydir");
dirObj["delete"]();


Note: The delete method needs to be brackets because itdi sometimes is not able to detect the referenced methods so you will need to de-reference the delete method, If not you would face a parser exception.

Friday, 6 February 2015

Changing TIM's Case insensitivity to Case Sensitivity

By Default all the attributes of a person objectclass in TIM is setup in case insensitive.
Changing the case in TIM Identity data fields doesn't not work. To reproduce: Open an existing user, change a case of one or more letters in the name (cn), surname (sn), mail or postOfficeBox. Click submit.
After the request is completed check the values. They have not changed. Issues it is causing: If HR changes case in these values for an existing user, the HR feed tries to update these values every night and never suceeds.

Can you check in the TDS web admin tool to see if these attribute values are set to case insensitive? If they are, please try changing them to 'case sensitive' and test again.
Equality is currently set to caseIgnoreMatch. So is ordering and the substring. Shall we set all to caseExact or only the equality? What side effects does this introduce?
To be frank i am not sure of this.
i have done this change and the only difference i am seeing is that my search has also become case sensitive search

If you dont want this change then the alternative would be to change your details to something that is completely different and revert back the change to old one with the case sensitive format.
Confused --- don't be --see the below example.

Example:----
I have a cn called dummies i want it to be changed to DummieS
dummies change it to dummies1 and then change it to DummieS

Wednesday, 4 February 2015

Getting a list of registered users in ISAM ESSO using DB.


Yes This is possible but to get the list of registered users you need to connect to the database of ESSO and run the query to get the list of users.

The information about registered IMS users is held in the table 'IMSIDENTITYUNIQUEATTRIBUTE '
Each registered user will have 4 rows in this table, link by their unique IMS ID assigned when they registered.

You can look at the information in this table by using some simple SQL queries.
Connect to your IMSDB using the tools appropriate to your Database type, eg DB2, MS SQL.

1) To see just the users EnterpriseUserName:-

SELECT * FROM <SCHEMA>.IMSIDENTITYUNIQUEATTRIBUTE AS I WHERE I.ATTRNAME = 'Enterprise Login'

2) To see just the users userPrinicalName, then use 'EnterpriseUpn' for the ATTRNAME filter in the above SQL:-

SELECT * FROM <SCHEMA>.IMSIDENTITYUNIQUEATTRIBUTE AS I WHERE I.ATTRNAME = 'EnterpriseUpn'

3) To see both of these value per user, the following type of SQL can be used:-

SELECT T1.imsID, T1.Ent, T2.Upn FROM
(SELECT imsID, Attrvalue as Ent FROM <SCHEMA>.IMSIDENTITYUNIQUEATTRIBUTE
WHERE ATTRNAME = 'Enterprise Login') AS T1
JOIN
(SELECT imsID, Attrvalue as Upn FROM <SCHEMA>.IMSIDENTITYUNIQUEATTRIBUTE
WHERE ATTRNAME = 'EnterpriseUpn') AS T2
ON (T1.imsID = T2.imsID)


<SCHEMA> value will depend on your installation, eg IMSDB, DB2ADMIN, etc.


References:

Tuesday, 6 January 2015

How to modify the ISIM Person Form using LDIF File


 Steps to modify a ISIM Person attributes like adding a new custom attribute using LDIF rather than IDSWebApp:

1) Identify what type of attribute you want to add like a string type or a date type or an integer.

2) Next create an LDIF file like the one in the below format.(Just replace the below customattribute words to a naming of your preference) and name it as myschema.ldif
dn: cn=schemachangetype: modifyadd: attributetypesattributetypes: ( customattribute-oid NAME ( 'customattribute' )                  DESC 'An attribute I defined for my LDAP application'                  EQUALITY 2.5.13.2 SYNTAX 1.3.6.1.4.1.1466.115.121.1.15                  {200} USAGE userApplications )-add: ibmattributetypesibmattributetypes: ( customattribute-oid  DBNAME ( 'customattribute' 'customattribute' )                     ACCESS-CLASS normal LENGTH 200 )

3) Now open the command prompt and browse to {LDAP installed location}\bin folder.
Eg: C:\IBM\ldap\V6.3\bin

4) Run the command with the appropriate parameters.
ldapmodify -D <admindn> -w <adminpw> -p <Port of the tds instance> -i myschema.ldif

5) Now your Attribute has been successfully added to IBM TDS.

6) Connect to your TDS instance using any third party browsers like Ldapbrowser or softera browser and connect to suffix called cn=schema using the cn=root userid.

7) Now check for your person objectclass attribute values which are represented using "$", If you are using inetorgperson object class then use the below example.

This example ldif file is for the default object class inetorgperson
If you are using your own objectclass then make sure you use the attributes that are specific for your objectclass.

dn: cn=schema
changetype: modify
replace: objectclasses
objectclasses: ( 2.16.840.1.113730.3.2.2 NAME 'inetOrgPerson' DESC 'Defines entries representing people in an organizations enterprise network.' SUP organizationalPerson STRUCTURAL MAY ( audio $ businessCategory $ carLicense $ departmentNumber $ displayName $ employeeNumber $ employeeType $ givenName $ homePhone $ homePostalAddress $ initials $ jpegPhoto $ labeledURI $ mail $ manager $ mobile $ customattribute $ atsgroups $ o $ pager $ photo $ preferredLanguage $ roomNumber $ secretary $ uid $ userCertificate $ userPKCS12 $ userSMIMECertificate $ x500UniqueIdentifier ) )

8) Save your LDIF file as person.ldif. 

9) Use the below ldapmodify command.
ldapmodify -D <admindn> -w <adminpw> -p <Port of the tds instance> -i person.ldif

10) Now restart your instance and thats it your attribute is successfully added to your ISIM Person objectclass.

Monday, 1 December 2014

How to find the DB2 port and server name

Below is the most common method to check the DB2 port and server name in different environments.

To locate the server name and port number on Windows:
  1. Open the DB2 Control Center on the remote Windows server.
  2. Right-click one of the available instances for the local machine.
  3. Click Setup Communications.
  4. Click Properties. The port number is listed in the Properties window.

To locate the server name and port number in unix environments:
  1. Open a command prompt.
  2. Enter cd /usr/etc.
  3. Enter cat services.
  4. Scroll through the list of services until you find the connection port number for the database instance of the remote database. The instance name is usually listed as a comment. If it is not listed, complete the following steps to find the port:
    1. Open a DB2 command prompt.
    2. At the DB2 command prompt, verify that you are on the correct instance:get instance
    3. DB2 will report the current instance.
    4. Run the following command to find the service name for your instance:get dbm cfg | grep SVCE
      DB2 will report the service name. For example:TCP/IP Service name (SVCENAME) = db2cdb2inst24
    5. Use the service name to find the port number in the services file. For example, enter a command similar to this one:grep service_name /etc/services
      DB2 will return the information. For example:service_name 50012/tcp # Connection port for DB2 instance instance

Wednesday, 12 November 2014

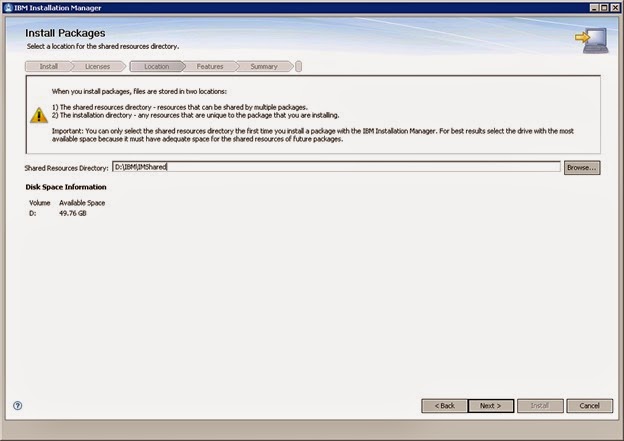
IBM Websphere V8.5.5.2 Installation(with screen shots) using IBM Installation Manager


The Installation of Websphere V8.5.5.2 using the Installation Manager:

Hmmm..... The version of the websphere V8.5.5.2 sounds fishy right. but do not worry the V8.5.5.2 is not the complete version of websphere.
The Websphere version is V8.5 with a fixpack of 5 and an interim fix pack of 2 so the complete version is V8.5.5.2.

So lets start with the installation steps,
To install the websphere versions of 8.0 and above IBM has provided a software called as the IBM Installation Manager, this software is used for the installation of the Websphere V8.0 and above.

So first start with the installation of IBM installation manager V1.5.2:

Installation Manager Steps:

Firstly make sure you have all the permissions to install a software in the machine, then click on the installation Icon.


Now lets start with the installation of Websphere:

While downloading the websphere software make sure you download all the parts of the websphere installation, take care that you dont miss anything in it.
Like make one folder for Websphere V8.5 and one folder for V8.5 fixpack 5 and one for V8.5.5 interim fix pack 2.
After downloading and extracting all the parts of the installation software make a new folder and copy all the contents of the Websphere installation from all the parts of the websphere installation folders. Make sure that you dont overwrite any folders or files while doing so.

Now lets open the Installation Manager  and start the installation of websphere.

Before Installing, we need to add repository file. Click on file -> Preferences ->Add Repository.
Add Each repository (i.e) websphere V8.5 and then V8.5 fixpack 5 and V8.5.5 interim fixpack 2.
and while adding the repository make sure you select the config.repository file and then click OK.


After add the repository make sure you select each repository and then click test connection.
If it shows as failed then you have failed to copy all the parts to the folder or you have overwritten some files while copying.
so try to make sure you have all the files of each part in the same folder and make sure you dont change the folder names while copying.
Now if test connection is successfull click on Install.


With this the Installation of the websphere is completed, 
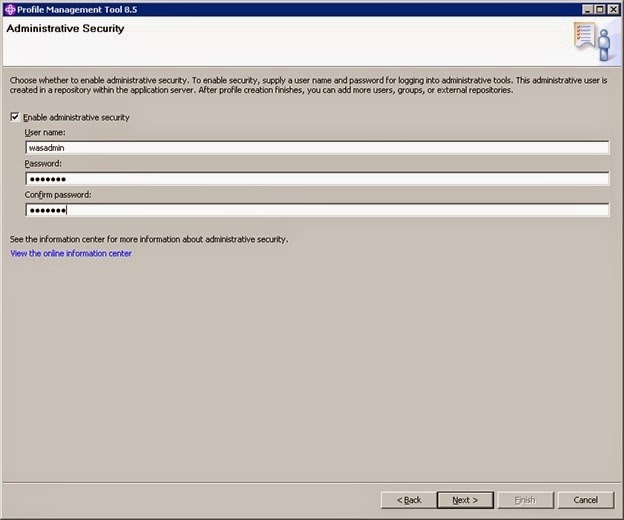
So go ahead and start the webshpere and try logging into the websphere console.
and in the home page it should look like the below.


Tuesday, 11 November 2014

ISIM 6.0 Installation (including prerequesities with screen shots) made easy

ISIM Installation with screen shots.

Prerequisites for ISIM 6.0 Installation:

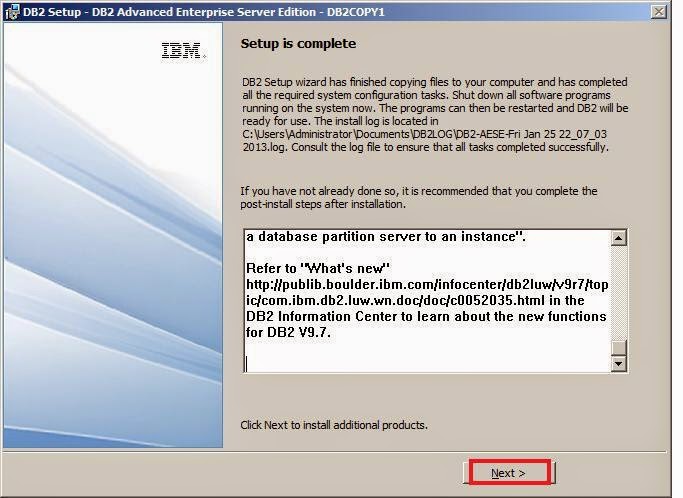
1. DB2 V9.7 with fix pack 4.


2. TDS V6.3 installation


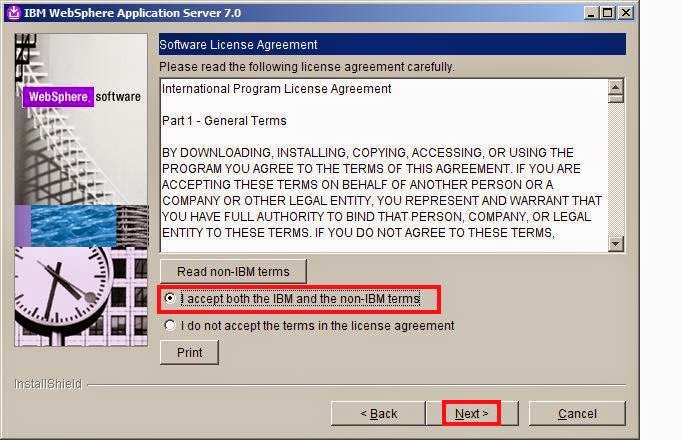
3. WebSphere installation (WAS V7.0 with fixpack 23):


4. ISIM Installation: